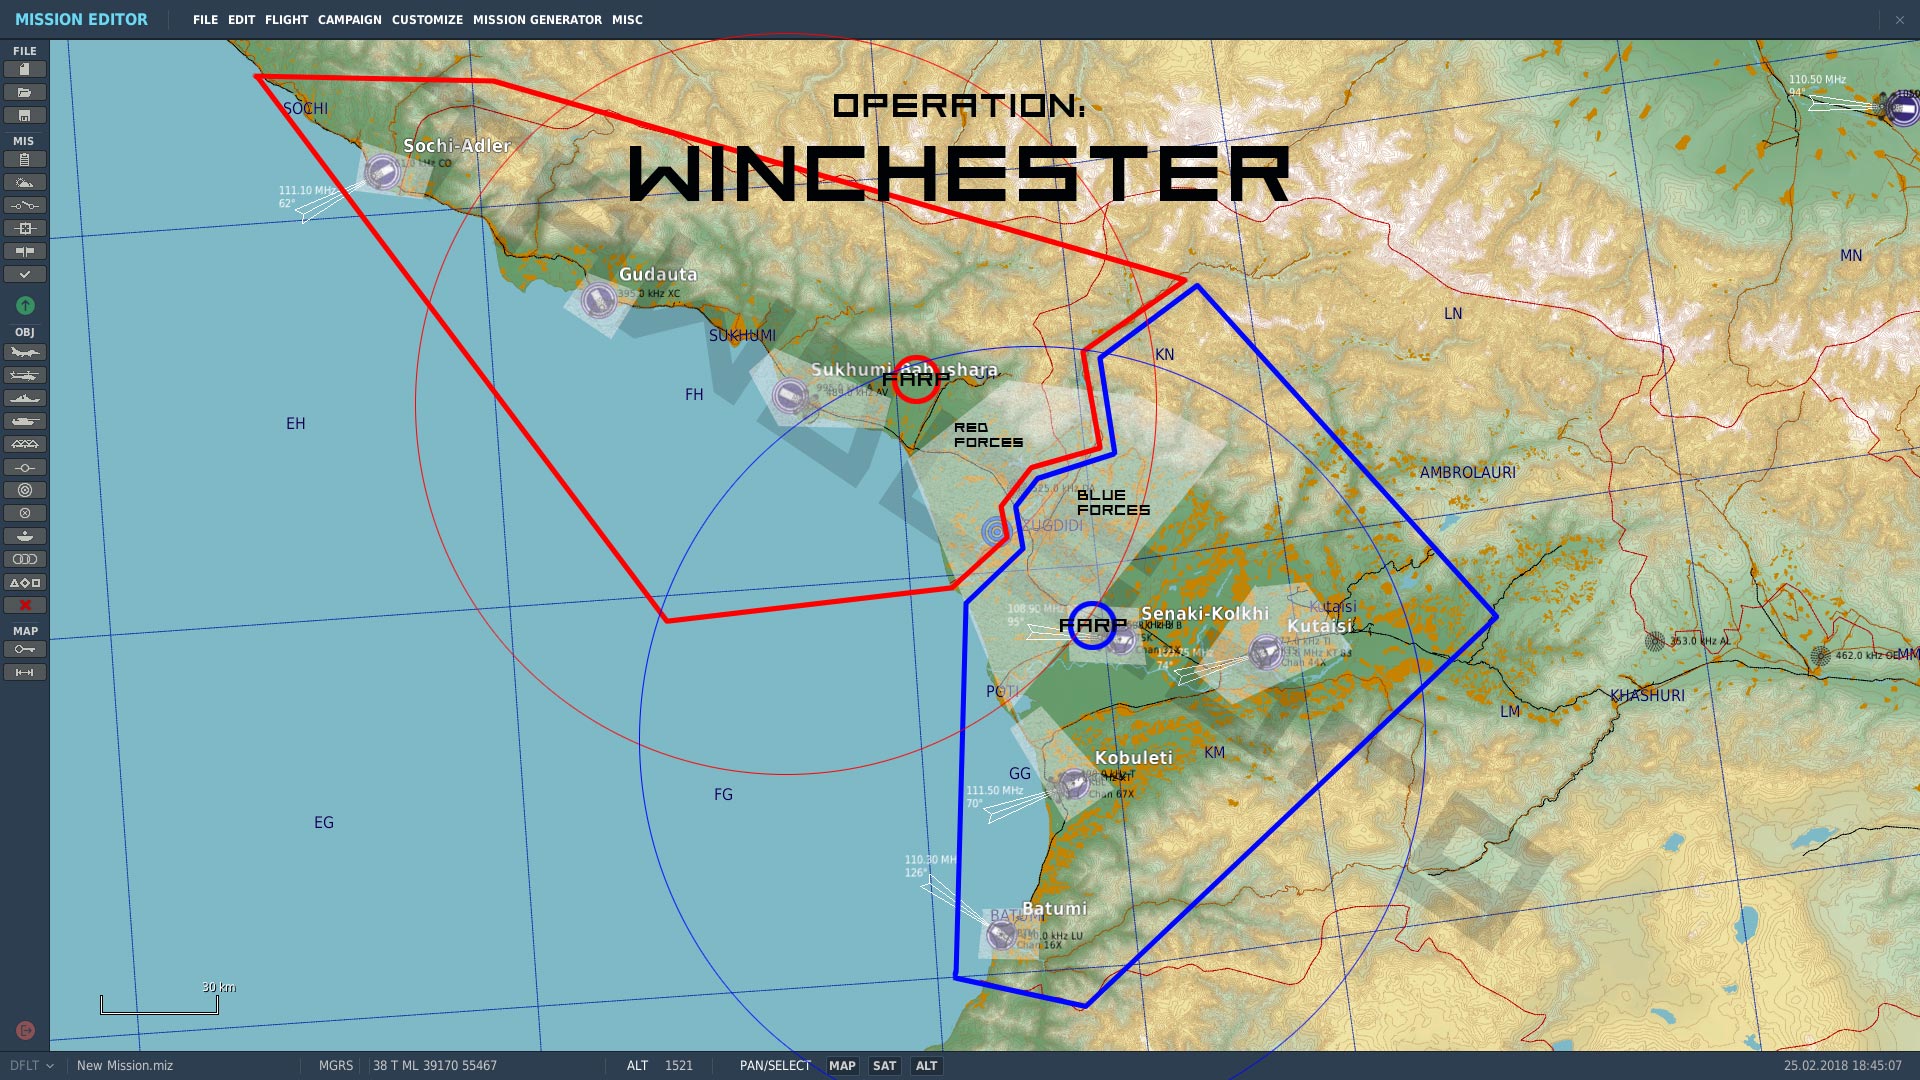
Made by redcoreSix
Overview
After extensive fighting for several weeks for control over the Persian Gulf both sides have been left with severe losses. BLUE is preparing retaliatory strikes after attacks on its air bases forced BLUE to mainly operate from small island bases.
Recent satellite reconnaissance shows RED is still busy repairing and reinforcing its positions. BLUE will seize the opportunity and strike with an all-out air campaign aimed at destroying the majority of RED forces before they can mobilize.
RED will have to hold off the attack for as long as possible until their units have been mobilized.
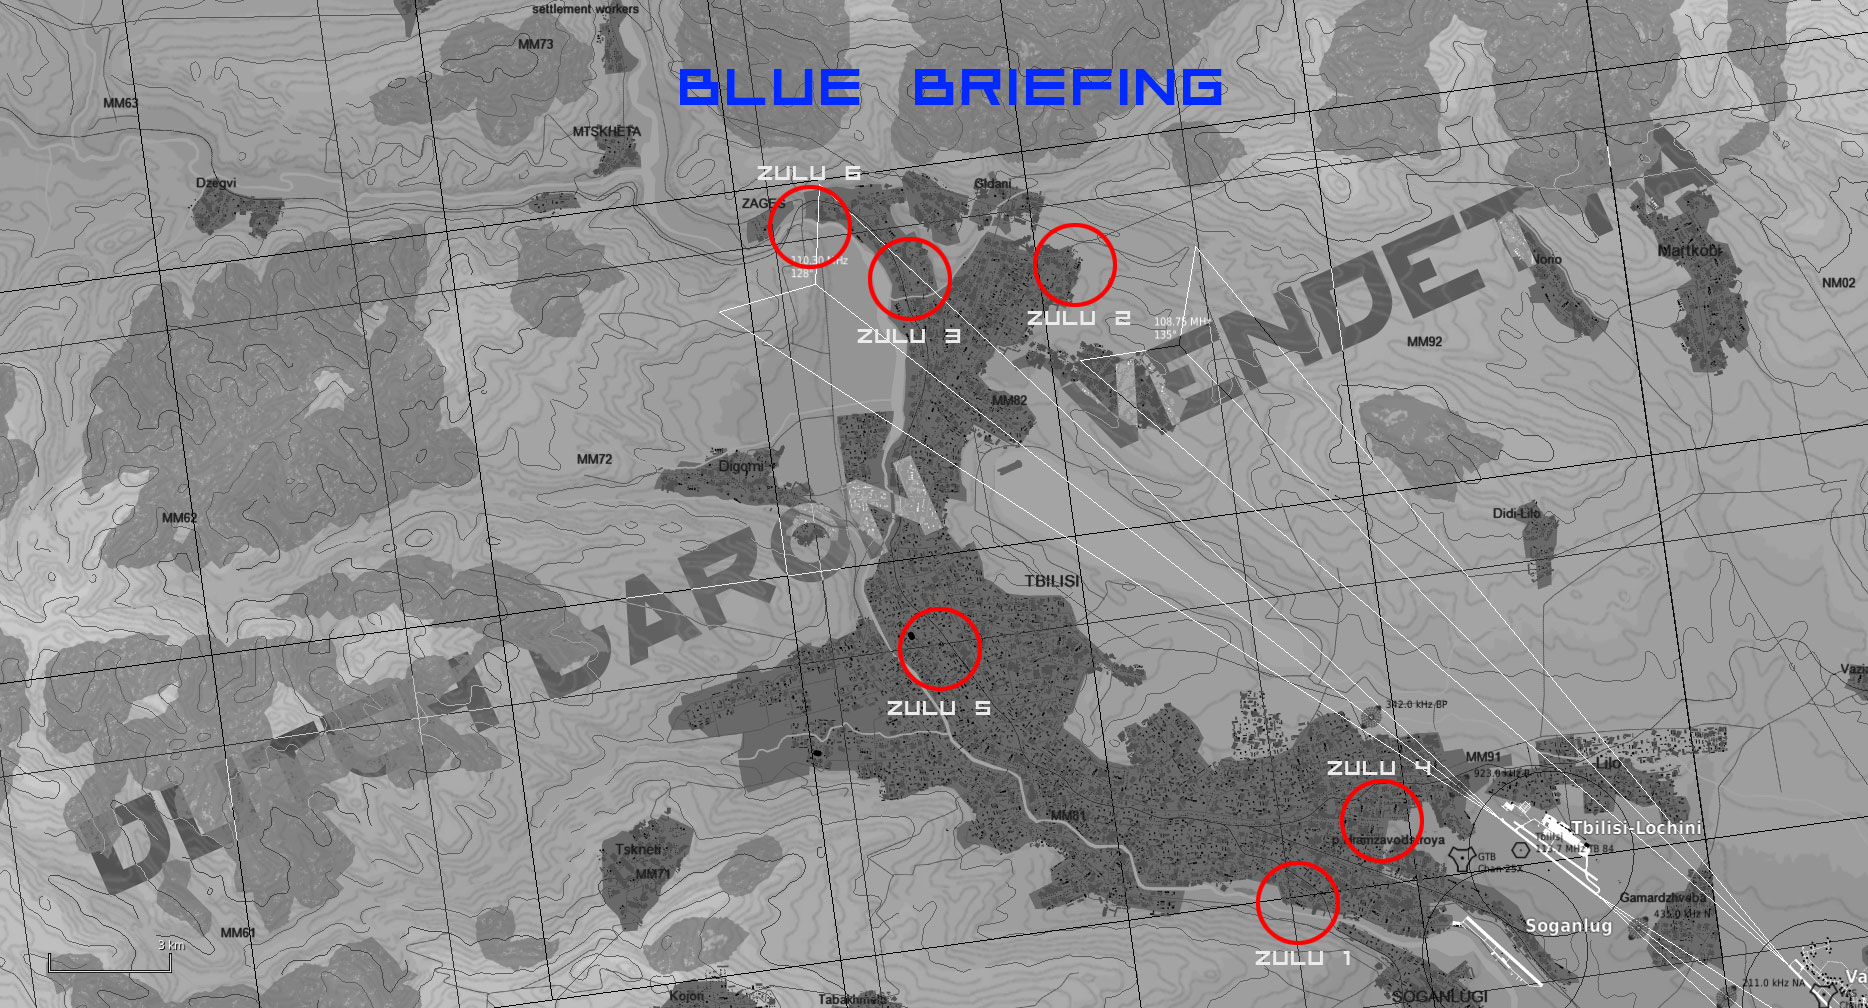
Blue Briefing
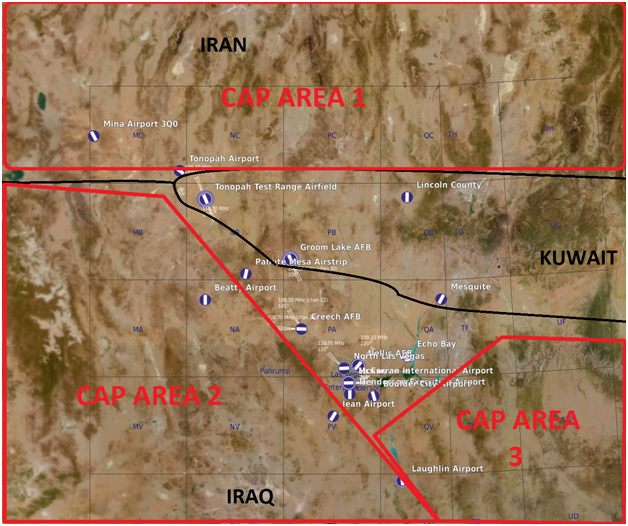
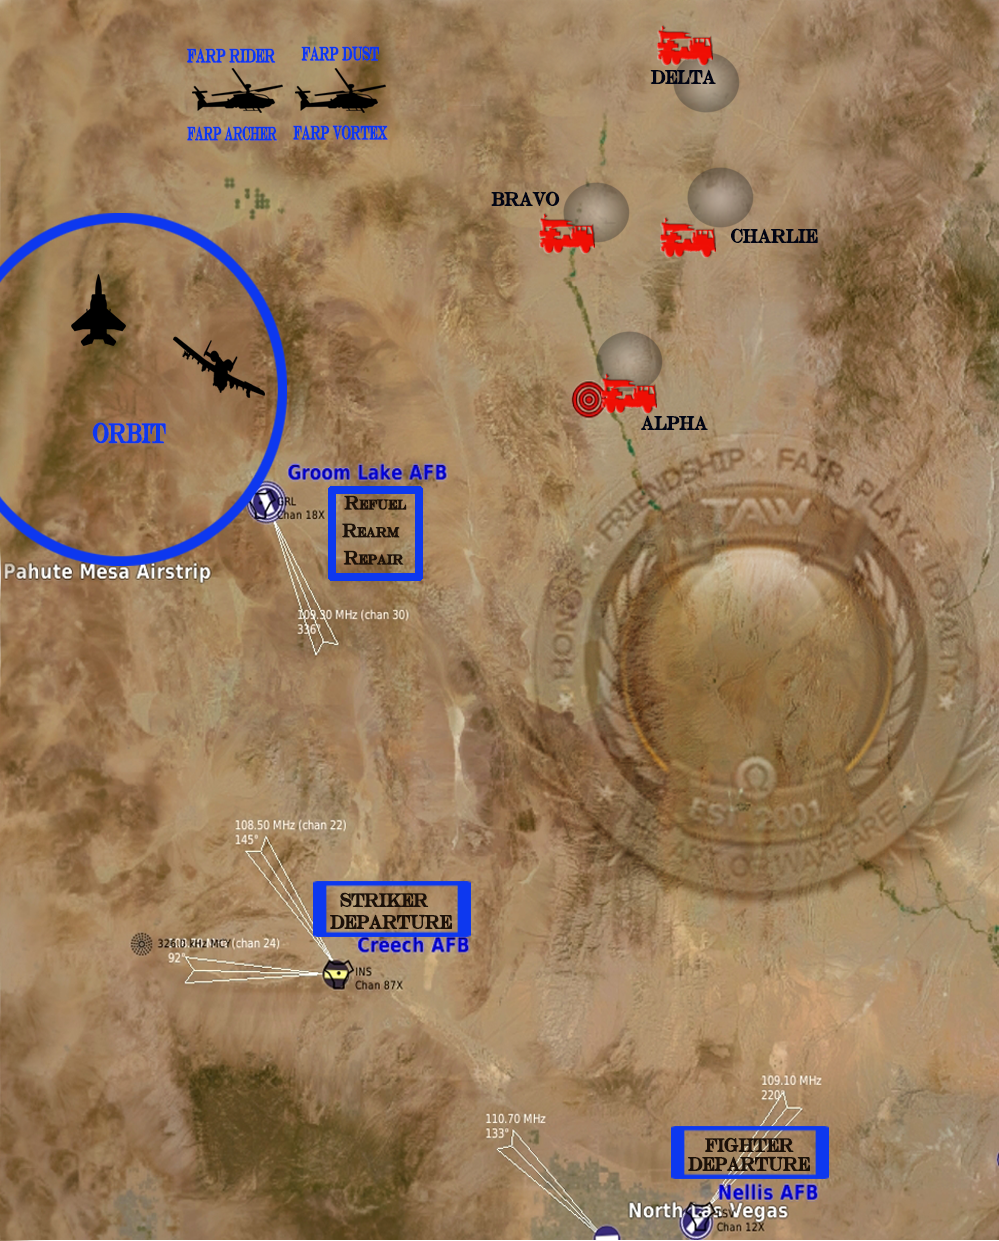
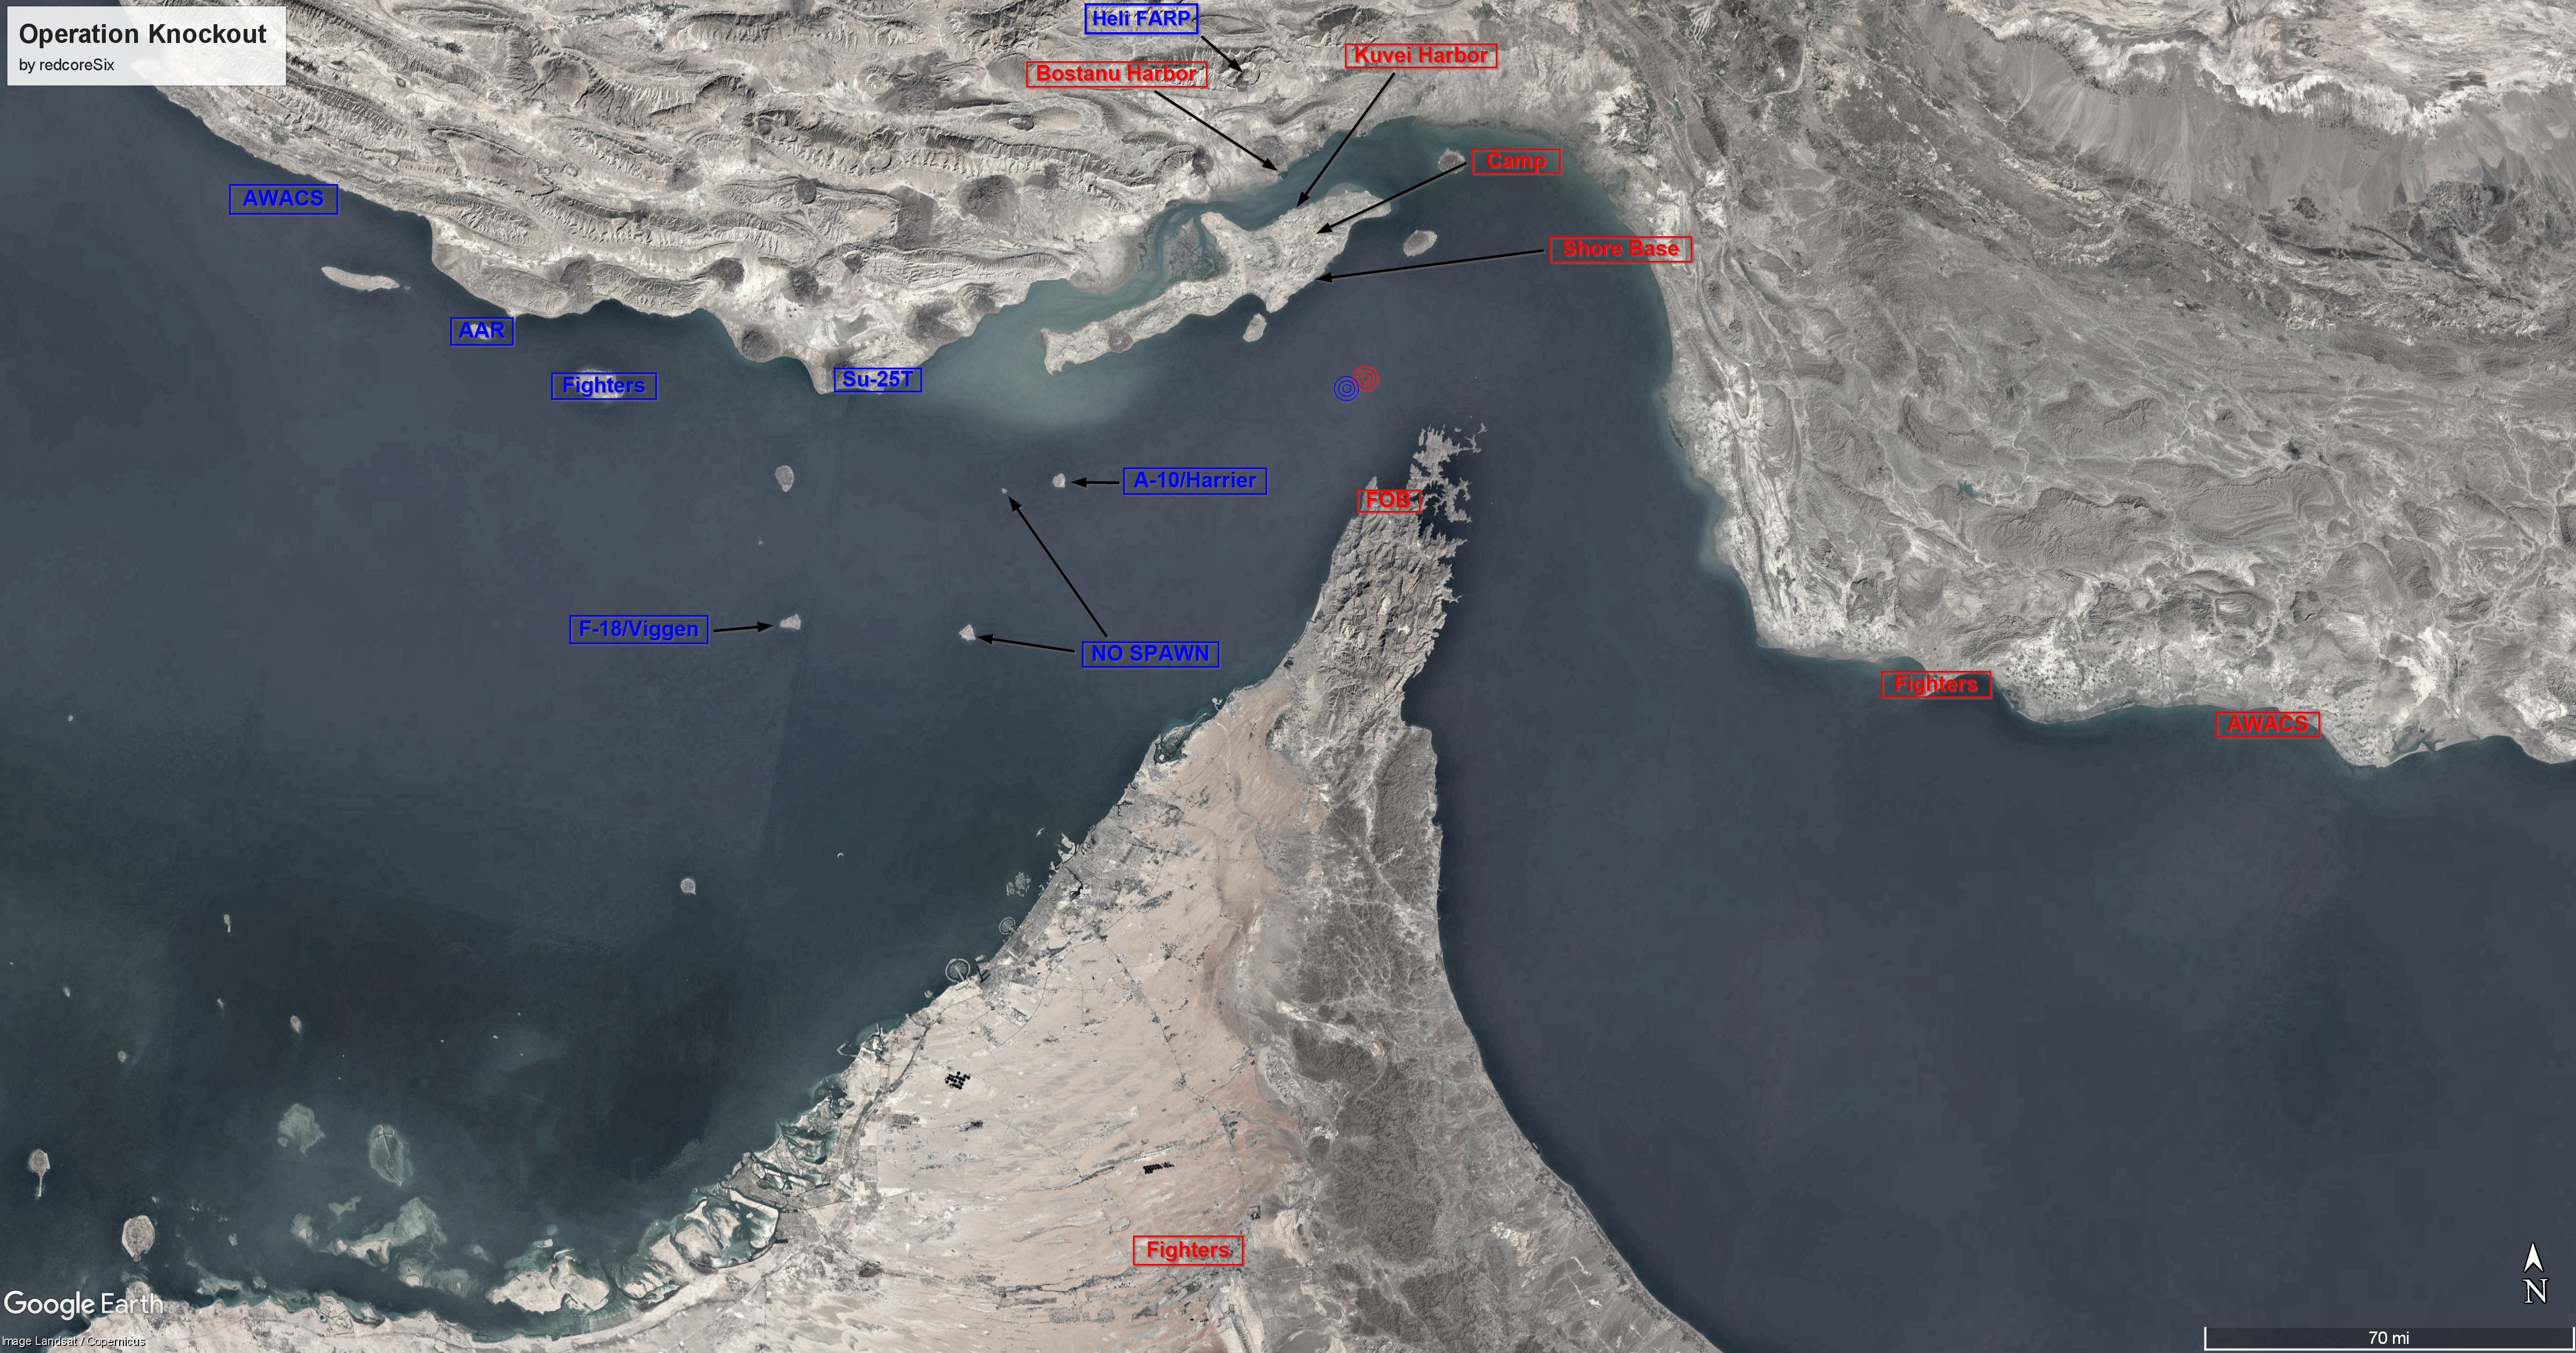
Friendly Airbases
- Kish International Airport (Fighters)
- Sirri Island (F/A-18, Viggen)
- Tunb Island AFB (A-10, Harrier)
- Bandar Lengeh (Su-25T)
- Abu Musa Island Airport (NO SPAWN, FUEL/WEAPONS ONLY)
- Tunb Kochak (NO SPAWN, FUEL/WEAPONS ONLY)
- Helicopter FARP (15NM north of Bostanu Harbor)
General Info
AWACS on 251Mhz AM
KC-130/135 on 251Mhz AM
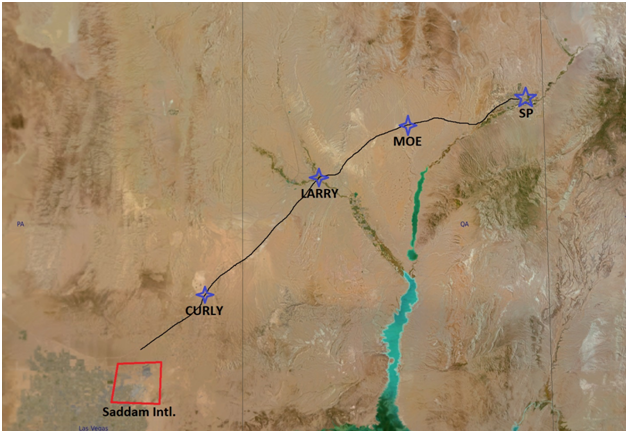
Waypoints
- Alignment Waypoint for all aircraft except FC3, Mirage and F-14 (listed aircraft deduct 1 from all waypoints)
- Bostanu Harbor
- Qeshm Southern Base
- Bullseye
- Homeplate
Fighter Tasking
Primary: Attain and maintain air supremacy over and north of Bullseye to allow friendly strikers to complete their mission.
Secondary: Protect AWACS from enemy intercepts.
Striker Tasking
Primary:
A Slava class cruiser is currently docked in Bostanu Harbor and undergoing repairs. The cruiser has to be sunk at all costs before repairs have finished. Any support equipment, fuel/ammunition trucks encountered on the harbor are to be destroyed. Additional air defense targets in the harbor are to be destroyed.
Multiple Tarantul class corvettes are docked in the harbor, they may be operational.
Bostanu Harbor: 27°2’28″N 55°58’20″E
Moskva in dock: 27°02’23″N 55°57’39″E
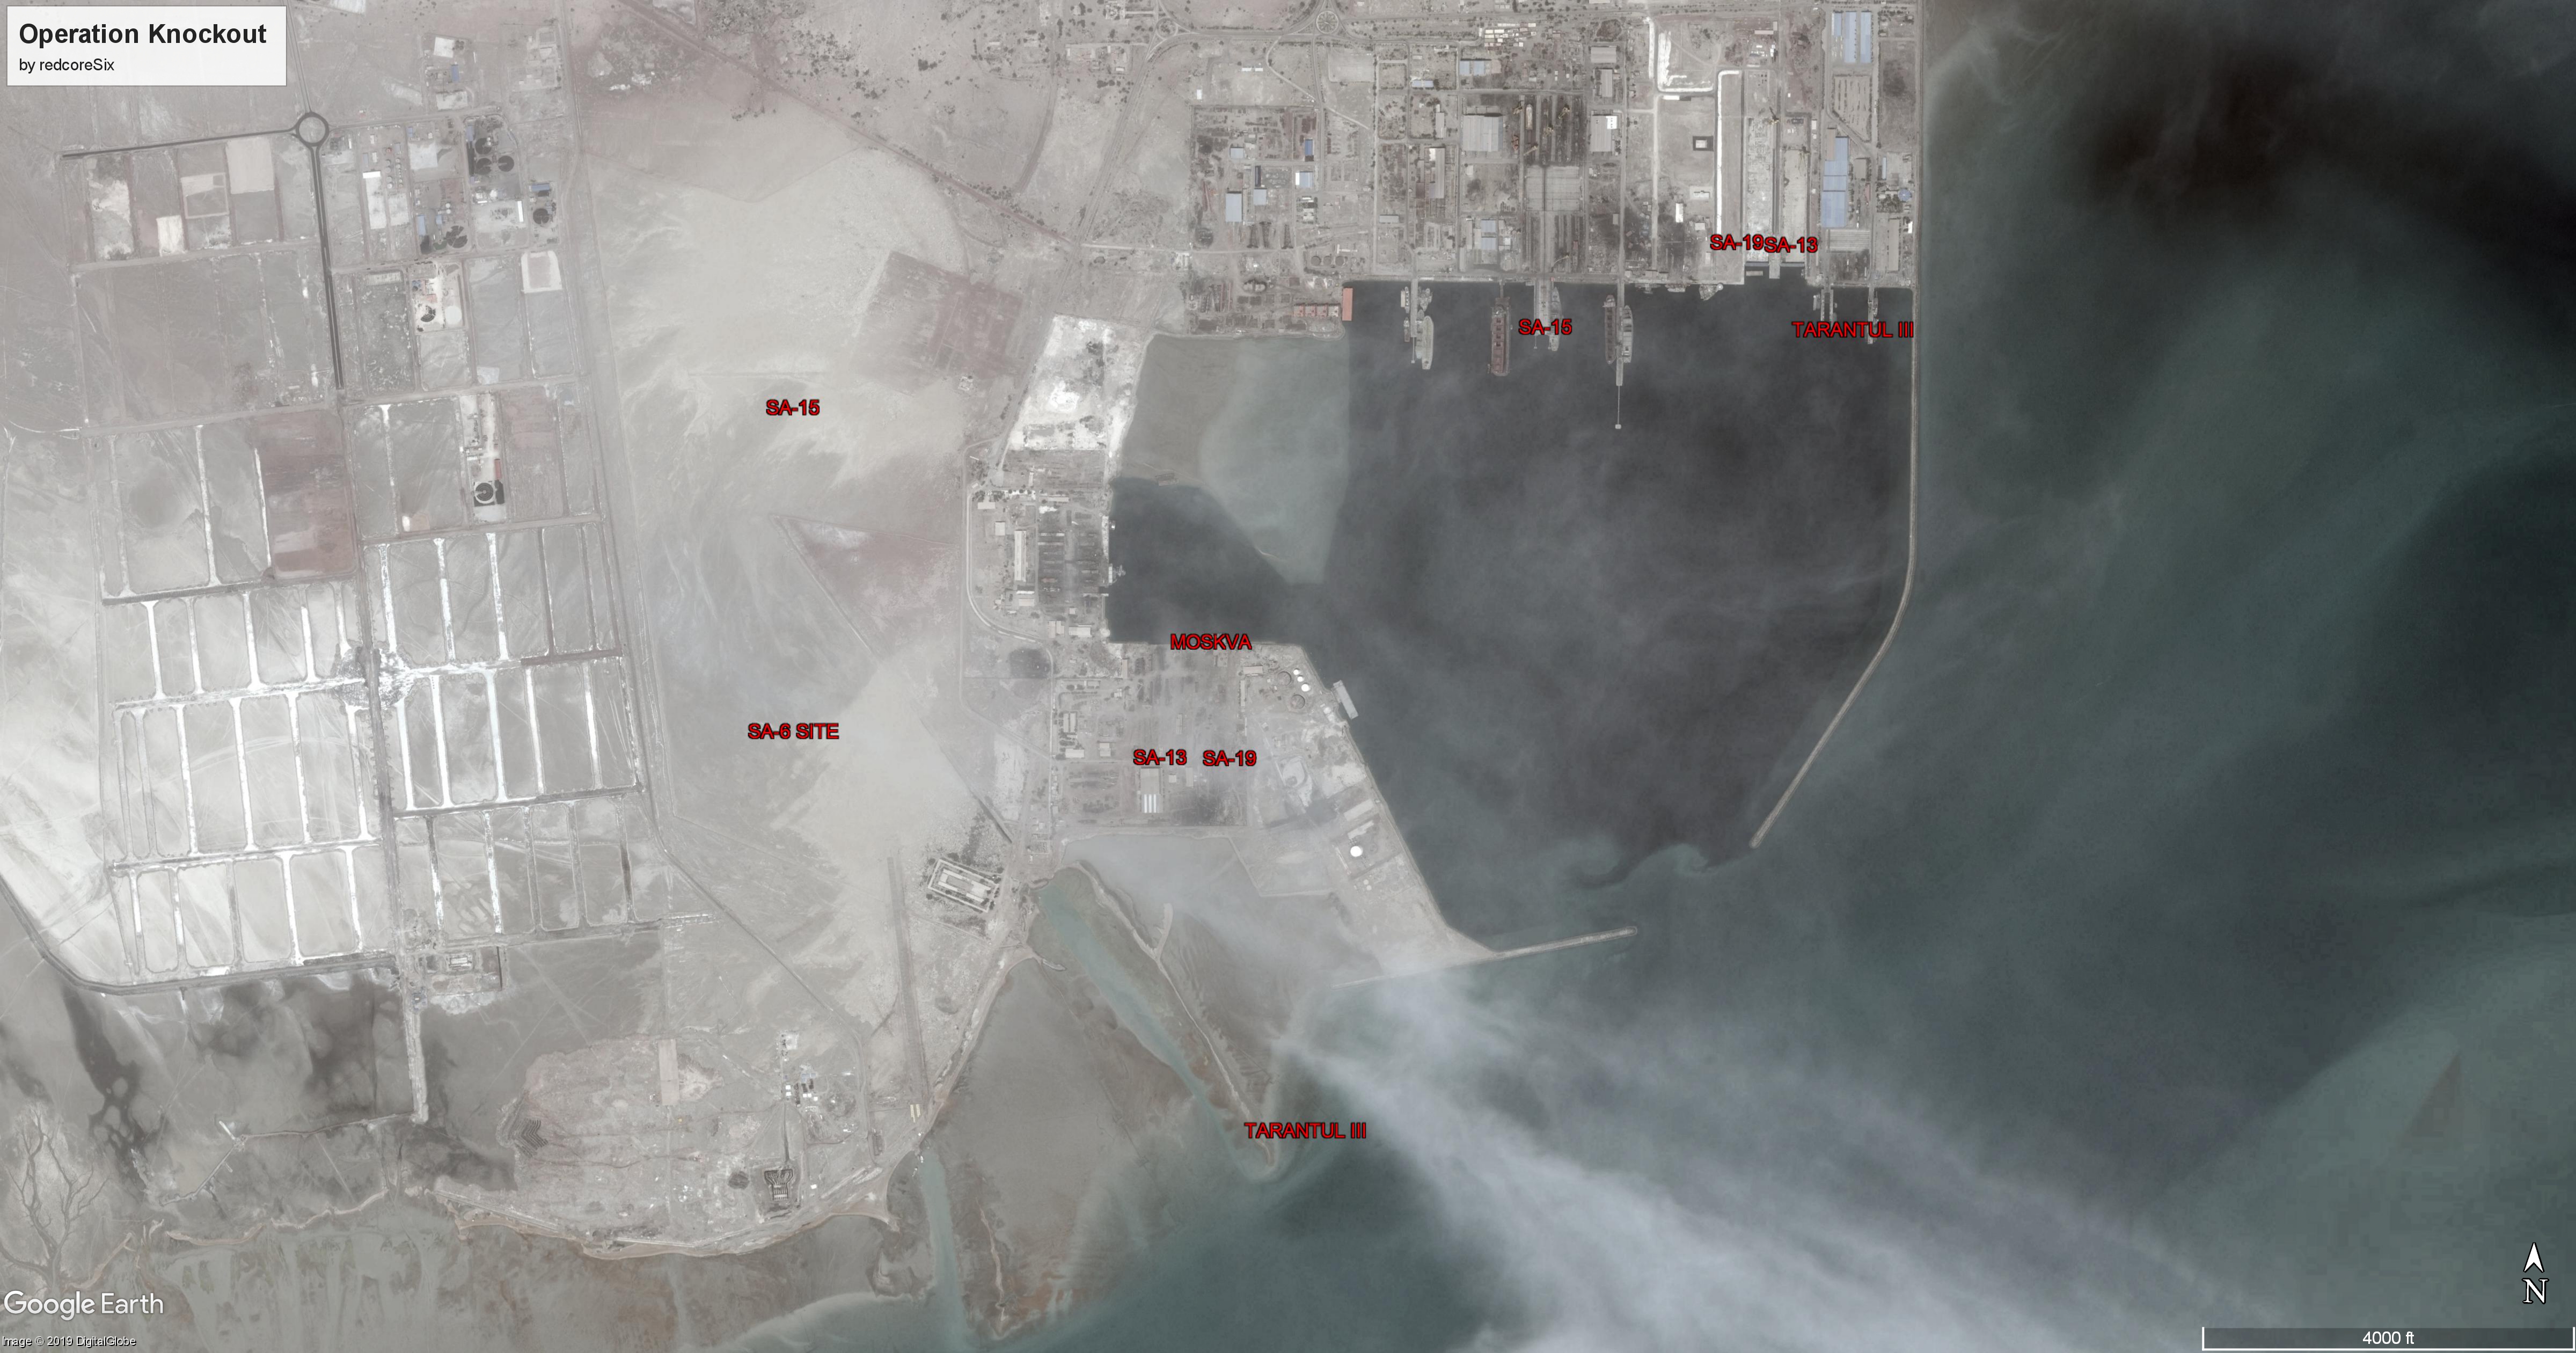
Tasking: Destroy the Slava class cruiser ‘Moskva’ docked in Bostanu Harbor before it is repaired.
SEAD: Suppress all air defense installations in and around Bostanu Harbor.
Secondary:
Intelligence suggests that the enemy is transporting reinforcements via ship to the Kuvei Harbor which is about 10nm south of Bostanu Harbor, located on the Qeshm island. The supply vessel transiting between the two harbors is to be sunk and maximum possible damage dealt to the Kuvei Harbor. The enemy can not be given the chance to reinforce their units on Qeshm.
Kuvei Harbor: 26°56’49″N 55°59’23″E
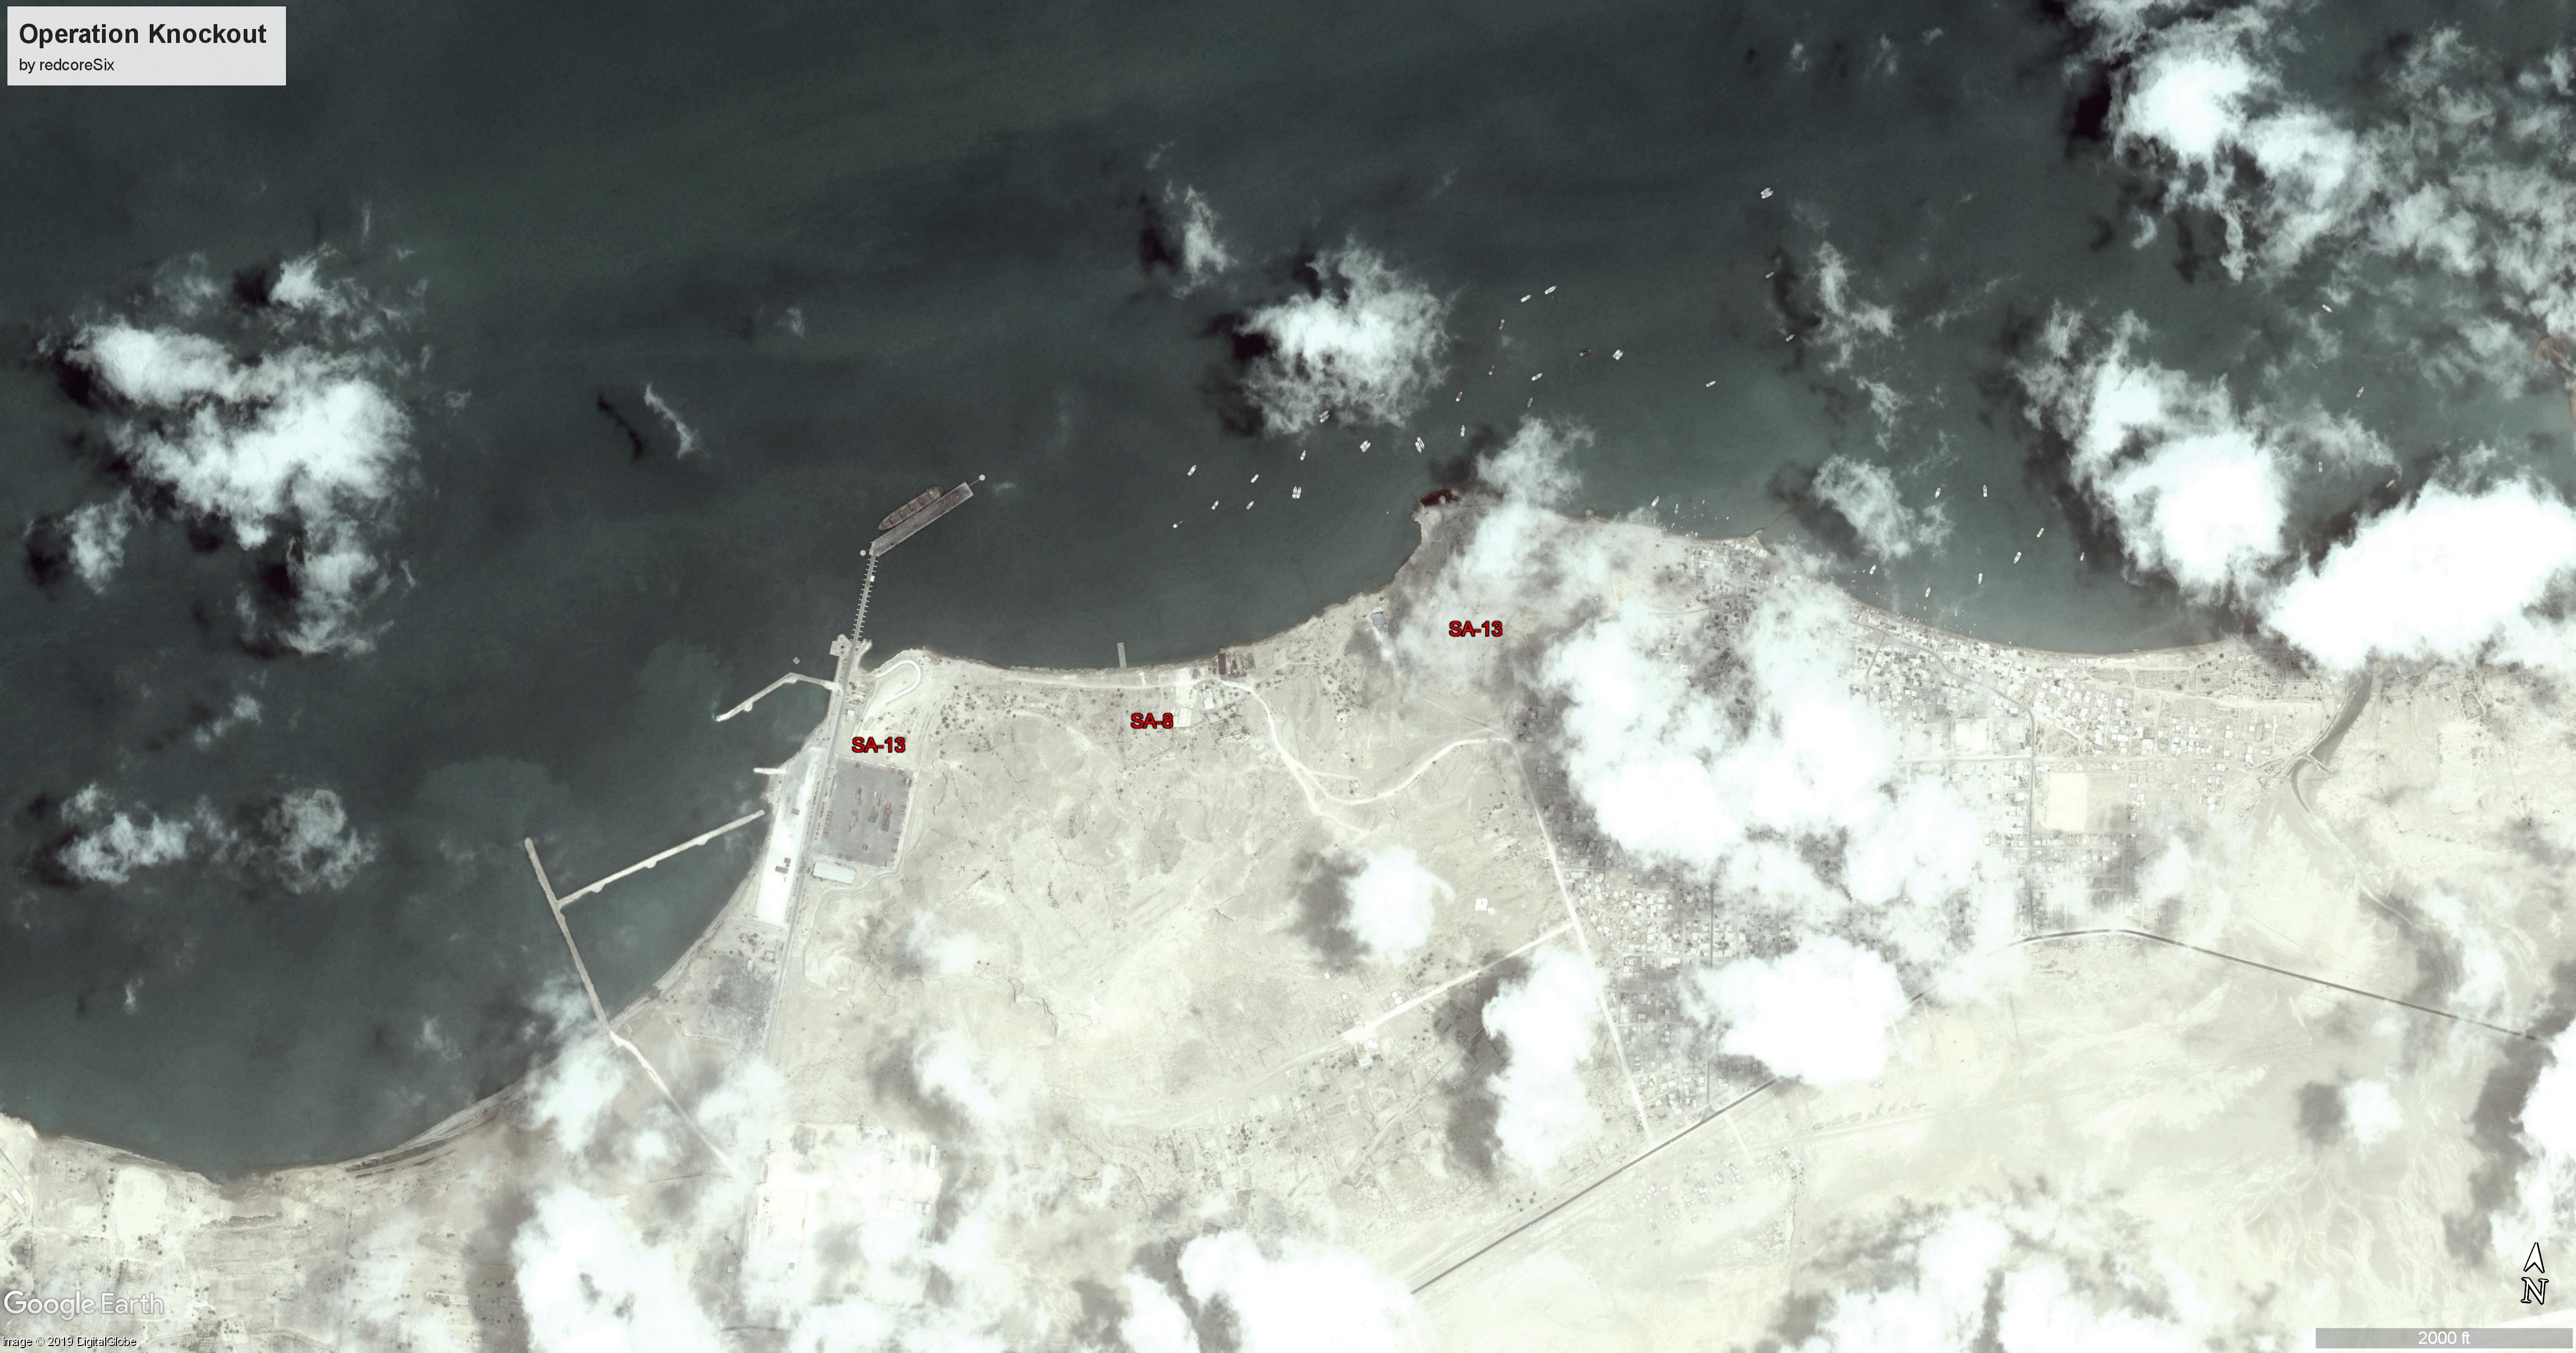
Tasking: Sink the supply vessel transporting supplies between the two harbors. Inflict maximum damage to Kuvei Harbor. Disregard any possible civilian vessels in the area, the supply vessel is a priority target.
SEAD: Suppress all air defense installations in and around Kuvei Harbor.
Secondary:
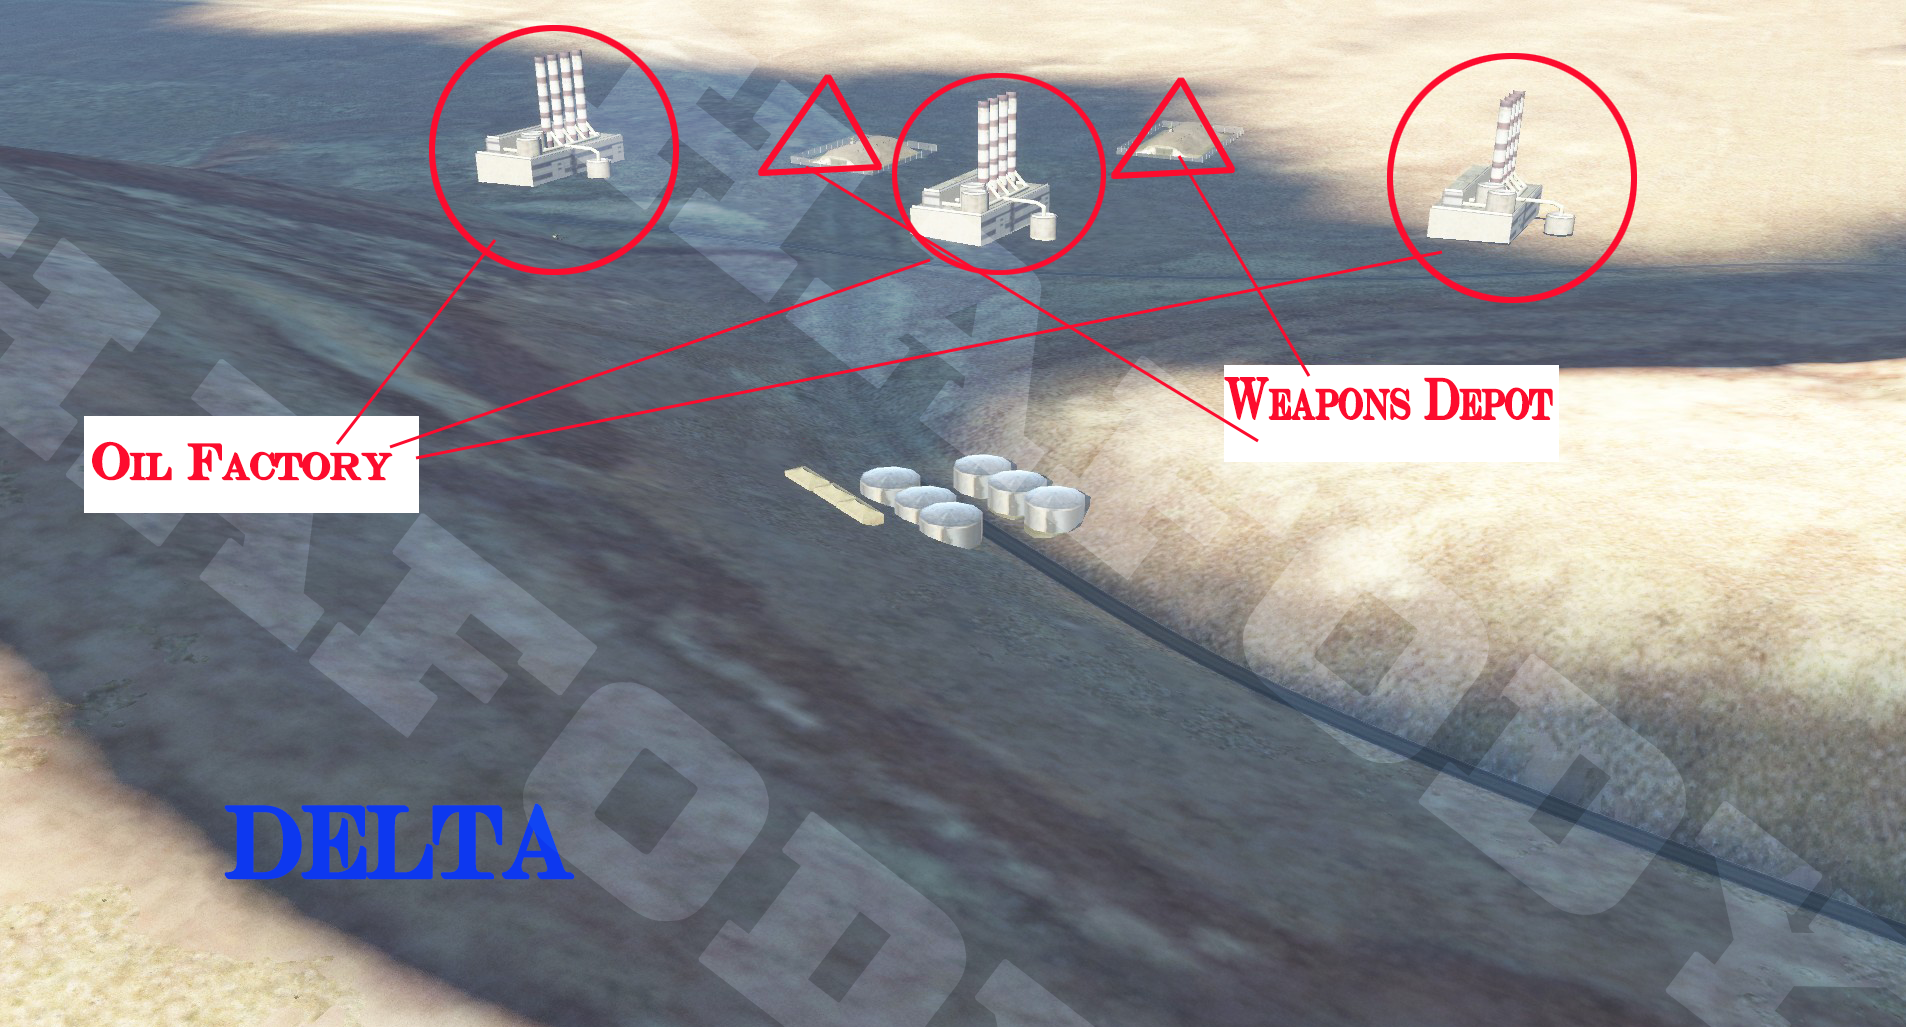
Enemy forces have established a temporary base on the southern shore of Qeshm. The base is to be attacked and any support equipment destroyed.
Temporary Base: 26°46’15” N 56°3’2″ E
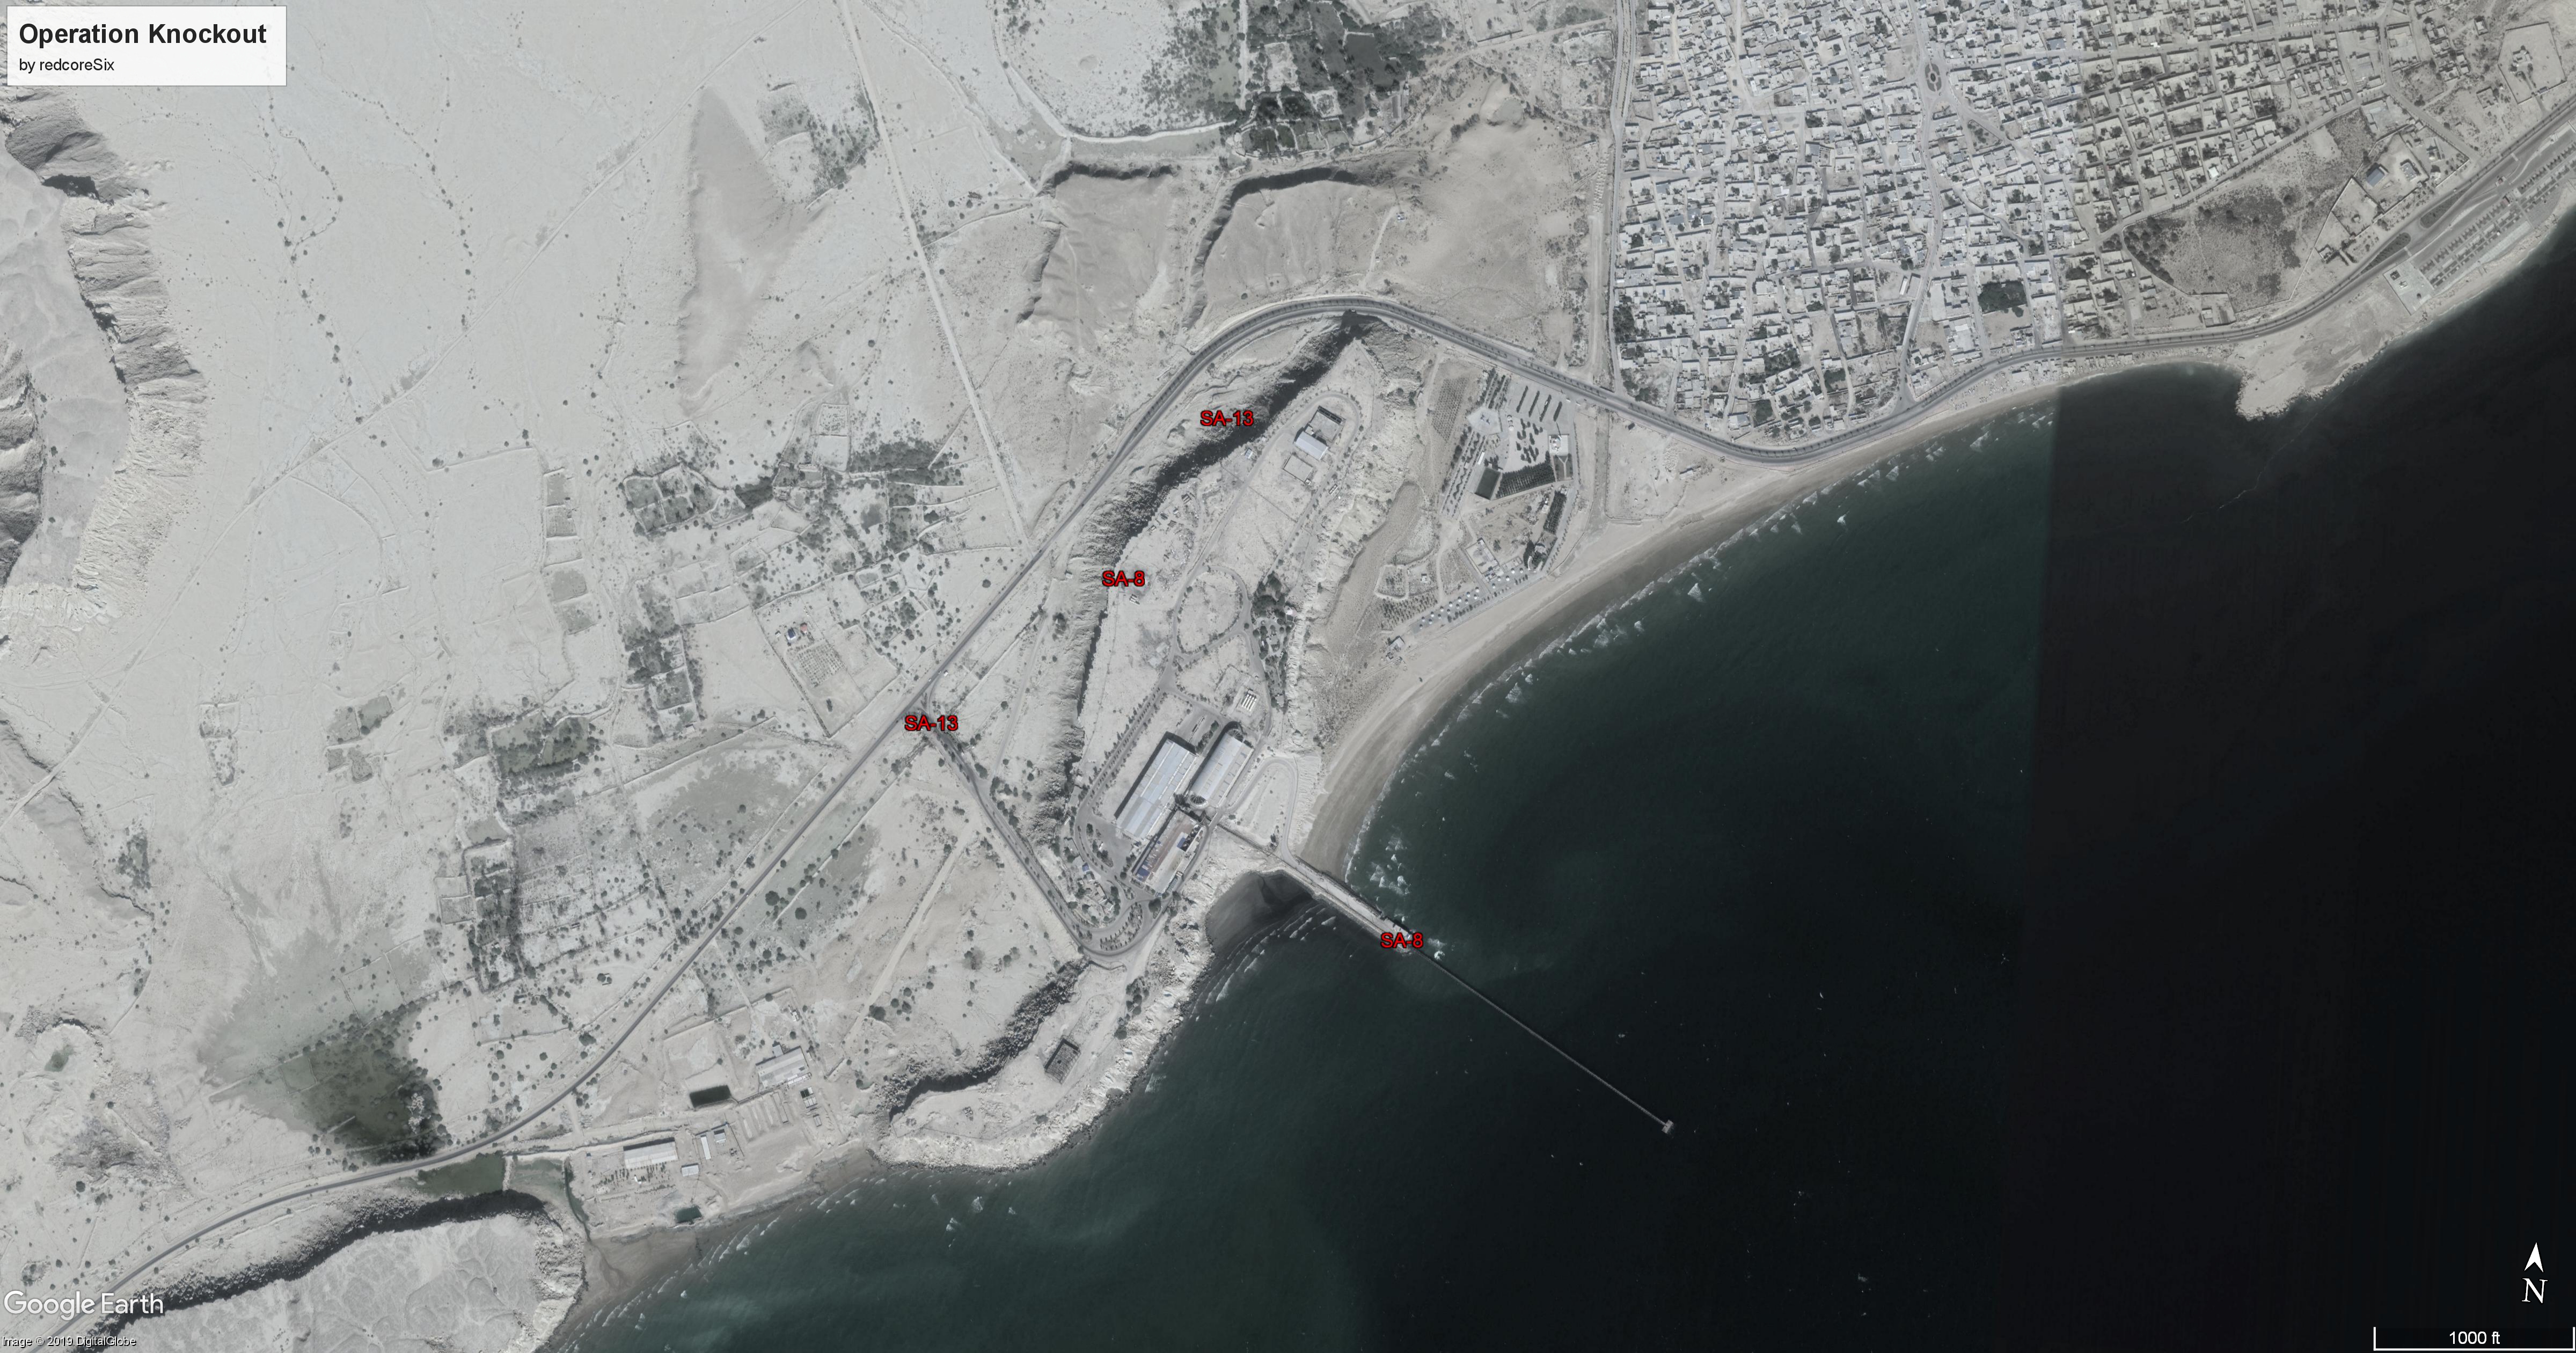
Tasking: Inflict maximum damage to the base. Take out support equipment.
SEAD: Suppress all air defense installations in the base.
Secondary:
The enemy has set up a forward operating base at Khasab airfield. Enemy aircraft could potentially use this base to refuel and rearm. This airfield is to be attacked, air defenses destroyed and a runway bombing conducted to deny usability of this field. A Tarantul class corvette is docked in the harbor just north of the field. There have been unconfirmed ELINT reports of spurious emissions from the mountains south of Khasab.
Khasab airfield: 26°10’03” N 56°14’22” E
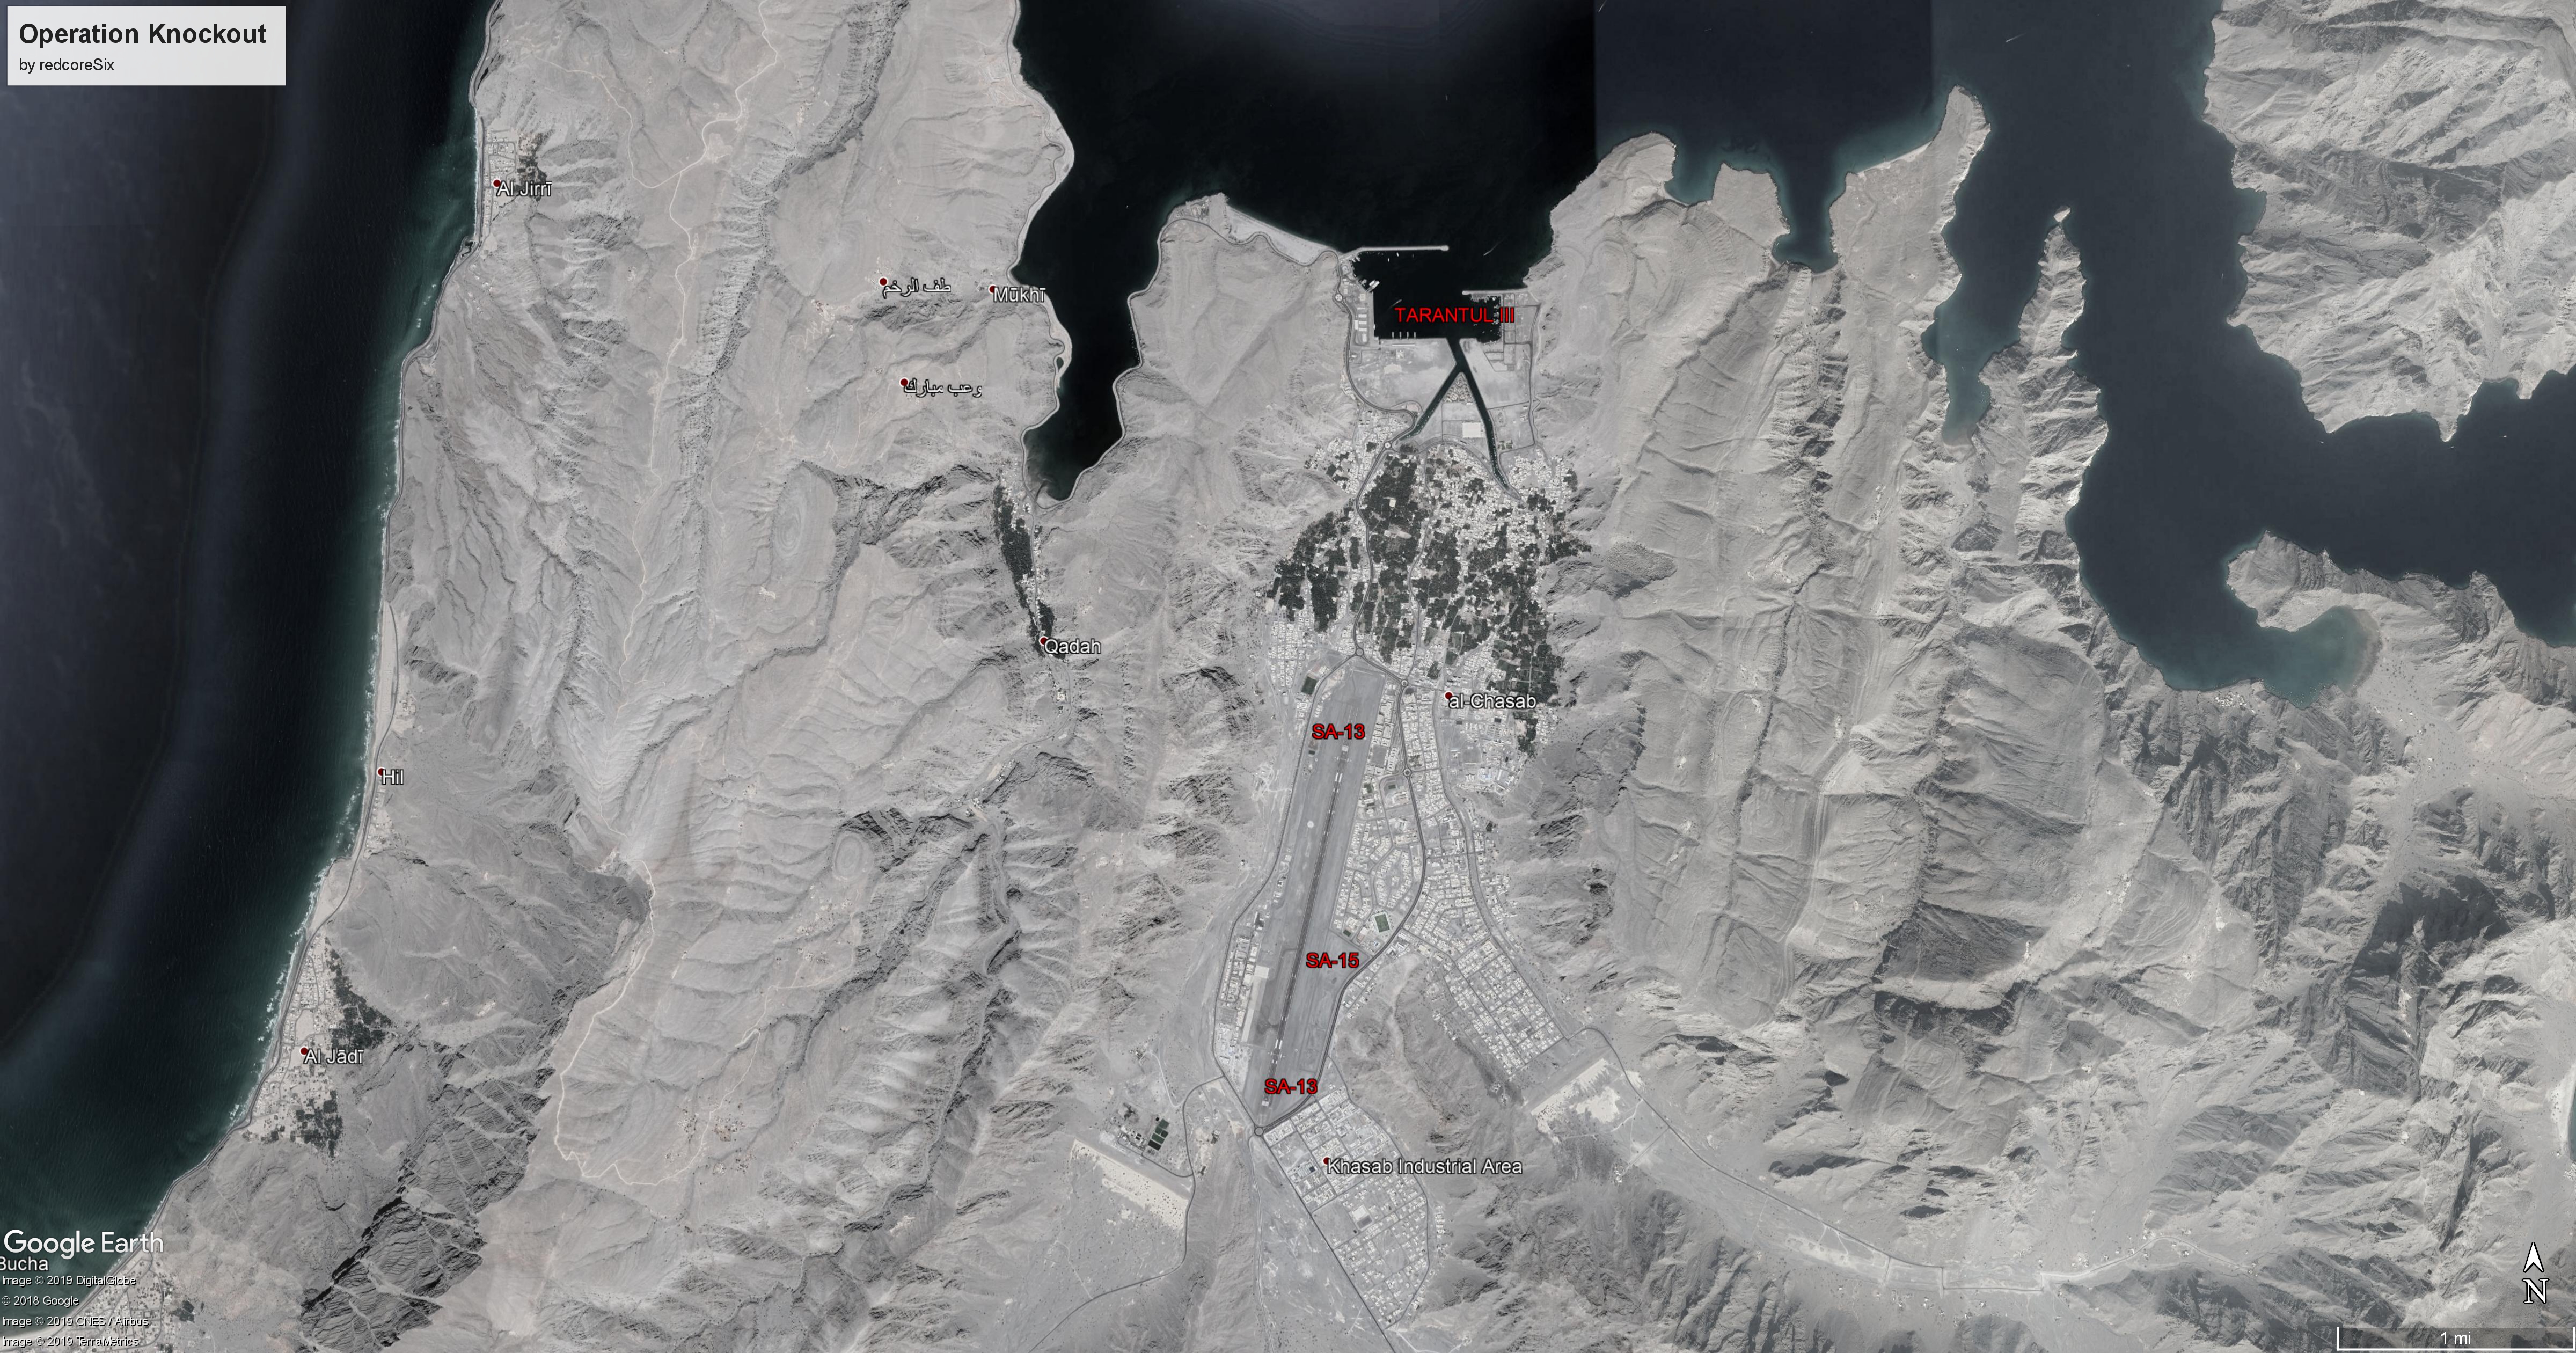
Tasking: Conduct runway bombing. Destroy air defense targets. Sink Tarantul class vessel in the harbor.
SEAD: Suppress all air defense installations in the base.
Secondary:
A few enemy forces have established a small perimeter in center Qeshm. This small camp is to be attacked.
Enemy camp: 26°53’33″N 56°3’23″E
Helicopter Tasking
The FARP is situated in a small valley between two hills and is protected by SHORAD against enemy fighters. It is about 15NM north of the harbor.
Primary:
Support the strikers at Bostanu Harbor. Sink the Moskva in dock. Destroy air defense targets and armor in and around the harbor. Be aware on your approach to the harbor, there have been reports of enemy armor north of the harbor taking up defensive positions specifically against helicopter incursions.
Bostanu Harbor: 27°2’28″N 55°58’20″E
Secondary:
Refer to striker brief.
Red Briefing
Friendly Airbases:
- Al Ain International Airport (All fighters except Mirage)
- Bandar-e-jask Airfield (Mirage)
- Khasab (NO SPAWN, FUEL/WEAPONS ONLY)
General Info
Khasab FOB available for refueling and rearming. Only light SAM cover, use with caution.
AWACS on 251MHz AM
Waypoints
- Alignment Waypoint for Mirage only (everyone else deduct 1 from all waypoints)
- Bullseye
- Other friendly SPAWNABLE airport
- Homeplate
Fighter Tasking
Primary
Attain and maintain air supremacy over and north of Bullseye to deny the enemy ability to strike our forces. Hold out long enough for repairs on the Moskva to finish and reinforcements arriving in Kuvei.
Secondary
Protect AWACS from enemy intercepts. Protect Khasab FOB from enemy strikes.